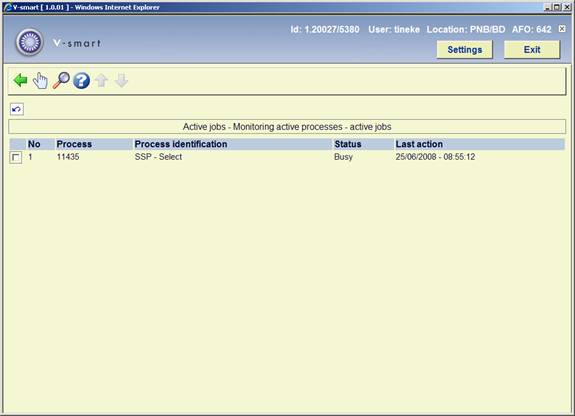
If you select this menu option, a list of active processes appears.
Process: This contains the process number.
Process identification: A brief description of the process.
Status: This contains the current status of the process.
Last action: This contains the time the last action was performed.
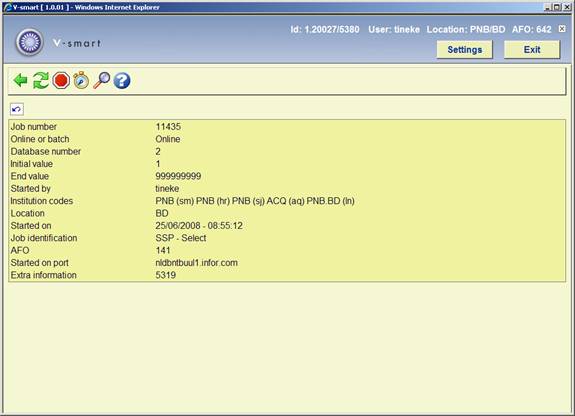
:Select a process and then select this option to view the data for this process.
:Select a process and select this option to display a list of statuses (complete, running, stopped, in queue) for the process in question.
If you select the ‘' option, an input screen appears with additional information about the process. You can also halt the process from this screen
: Select this option for an overview of the current status of this process. The data in this overview gives a snapshot of the process. Repeat this option to determine whether the process is still active.
: Select this option to interrupt the process. When you select this option, the system will ask you if you really want to stop the process.
: Select this option to check whether the process is still running. The system checks for one minute to see if the process is still active. During this check, the system reports on the program's progress.
: Select this option to display a list of statuses (ready, active, stopped, in queue) for the process in question. This option is identical to the option ‘Process status' on the previous screen.
If you select this menu option, a screen with an overview of the processes that have been started appears. The options and operation for monitoring started processes is identical to those for active processes.
Periodic process control allows you to modify the list of processes that must be performed periodically.
Processes are placed in a queue by selecting M(emory) when starting the process - rather than O(nline) or B(atch). The system will then ask you to specify the date and time at which the process must be started. This can occur once or at periodic intervals. Processes are thus not placed in the table in AFO 642, but in the AFO from which the process would normally be started. The night watchman will start the process at the moment you have specified.
Notes
· Do not start more than four processes within a time span of one minute.
· Start similar processes as quickly as possible after one another.
- For example, if you want to create a print file for overdues in AFO 451, renew a membership card and automatically change a borrower's categories, and want to execute a selection from the borrower file in AFO 435, you can start these processes immediately after one another. All four processes check the borrower file and, as a result of memory caching, can ‘profit' from each other's tasks and thus work more efficiently.
· Do not start too many dissimilar processes at the same time, because this can result in poor response times. For example, do not simultaneously start a selection from the bibliographic file, the barcode file, and the borrower file as well as a process that creates a print file with overdues.
· Divide the amount of time available during the night into ‘logical segments'.
- For example, first enter all processes that perform actions on the borrower file, then all processes that use the orders file, etc.
· Place critical processes at the start of the list and non-critical processes further down.
· The number of processes that can be started simultaneously is determined by the license installed on your system. Be sure not to exceed the limit for the maximum number of simultaneous processes. If you do, the process will not be started.
· If you use "Printing by location" (circulation, acquisitions, serials) this means that you are generating (running the process) only per location. Therefore you will have to set up separate Nightwatchman processes for each of the locations. I.e. log in at a specific location, set up the Nightwatchman process, switch to the next location, set up the Nightwatchman process, and so on. Make sure the times do not overlap though!
After selecting this option an overview screen will be displayed:

Process: This contains the process number.
Process identification This contains the description of the process.
Status: This contains the date and time at which the process is to start. The field shows the day of the week, the calendar day and the time in that sequence. An asterisk ( * ) means that the process is performed each month, each week day and at any time, respectively.
:Select a process and then select this option to display the data. An overview screen appears. This screen is explained below.
:Select a process and then select this option to delete a process.
Note!
Processes cannot be deleted from lists if they are still active.
:Select a process and select this option to display a list of statuses (complete, running, stopped, in queue) for the process in question.
:Select a process and select this option to generate a report for this process. The standard dialog screen for generating output will be presented.
:Select a process and then select this option to display the data. An overview screen appears:
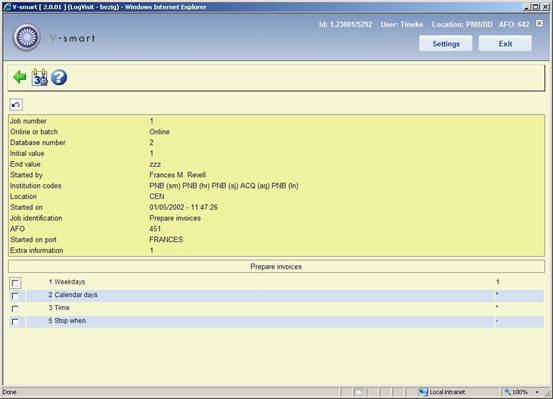
: Select this option to change the date and time data for the process. If you select this option, an input screen appears in which you can specify the days of the month, the week and the time. An asterisk ( * ) means that the process can be performed each month, each week day and at any time, respectively.
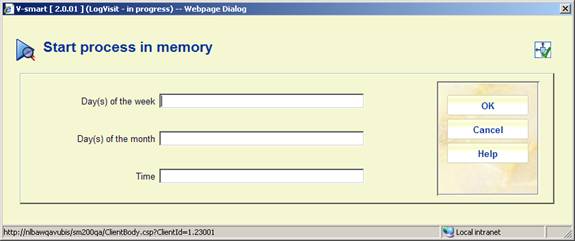
Day(s) of the week: Enter the day(s) of the week on which this proces must be performed (Monday = 1, Sunday = 7). If this proces is to be performed on every weekday, enter "*".
Day(s) of the month: Enter the day(s) of the month on which this proces must be performed ( 1 = first day, 8 = eighth day, 6/3 = sixth of March). For example: '1, 7, 9/3, 15, 27/11' means that the process is to be performed on the first, the seventh and the fifteenth of every month, the ninth of March and the twenty-seventh of November.
Enter "*" if the process is to be performed on every day of the month.
Please note!
The system assumes that there is an implicit AND relationship between this area and the previous area. In other words: if you indicate that a process is to be activated on Wednesday and you also indicate that it is to be performed on the fifteenth day of the month, the process will be performed the next time the fifteenth day of the month is on a Wednesday.
Time: Enter the time (notation: HH:MM) at which this process is to be performed (01:00 = one o'clock in the morning or 23:00 for 11:00 pm). If this process is to be performed at any particular time, enter "*".
Note
For more information about starting processes see the relevant information in the document V-smart general information.
Managing once off jobs displays a list of all processes that will be performed once. The working method and the options on this screen are totally identical to the working method and options for managing periodic jobs.
Since the jobs in this list are only executed once, they are deleted from the list as soon as the process starts.
If you choose this menu option, an overview screen appears with the active processes started by your password. The working method and the options on this screen are totally identical to the working method and options of active processes.
This menu option allows you to define a number of parameters related to the night watchman.
If you select this menu option, a screen appears with a timetable.

: Select a weekday and then select this option to set the time parameters. An input screen appears:
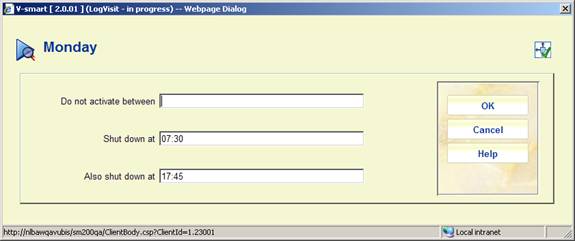
Do not activate between: Enter a time interval (use the format hh:mm). If the system is started during this period, the night watchman will not start automatically. The night watchman will start automatically outside the specified period. This period must be somewhat ‘longer' than the period in which the system would normally be used. For example, if you normally use the system between 8:00 a.m. and 8:30 p.m., you would enter “07:30-21:00” here.
Shut down at: Enter the time at which the night watchman must be stopped. We recommend that you stop the night watchman at bit earlier than the period at which you normally begin working with the system. The night watchman will stop at the moment you specify and the process will be deleted from the table of active processes.
Also shut down at: It is possible to stop the night watchman twice a day. Optionally enter the second time at which the night watchman must be stopped.
Note
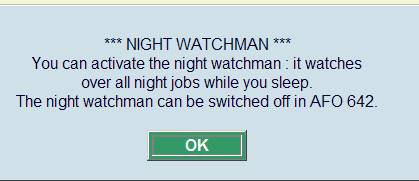
You can prevent automatic starting of the night watchman outside the specified period, since the system asks “Start night watchman? <Y>” when it starts the process. If you enter “N” here, the night watchman will not start. The system gives you one minute in which to enter “N”. After that, the night watchman process begins..
The menu option ‘Night watchman' is intended to enable you to start the night watchman manually. If you use this option, you must also specify the time at which the system must be automatically stopped to start the back-up procedure using the ‘Timetables/parameters' option.
If you select this menu option, a screen appears:
This screen shows the time (if set with the option ‘Timetables/parameters') at which the system will be stopped.
Select to continue.
The system switches immediately to the standard procedure for starting processes.
Note!
The night watchman cannot be started from ‘memory'.
With this option you can specify after how many days started processes that are no longer active can be removed from the list displayed in ‘List of started jobs'.
After choosing this option an input screen is displayed:

Enter the required number of days.
· Document control - Change History
|
Version |
Date |
Change description |
Author |
|
1.0 |
June 2008 |
creation |
|
|
1.1 |
August 2008 |
replaced screen shot in 642.3.3 |
|
|
2.0 |
November 2009 |
textual improvements; new option to stop night watchman twice a day |
|